When to Build a Custom Solution
Custom solutions are ideal when:- Unique Use Cases: Your security workflow doesn’t fit pre-built solutions (ASM, DAST, Vulnerability Assessment)
- Custom Data Sources: You need to integrate internal tools, proprietary scanners, or organization-specific data
- Specialized Workflows: You require specific module combinations or custom enrichment steps
- Integration Requirements: You need to adapt outputs for downstream systems (SIEM, ticketing, data lakes)
- Compliance Needs: You have specific reporting or audit trail requirements
If you’re extending an existing solution (ASM, DAST, VA) rather than building from scratch, you can copy and modify the pre-built solution workflow as your starting point.
Step-by-Step: Creating a Custom Solution
Step 1: Create the Solution
Navigate to the Solutions page and click Create Solution.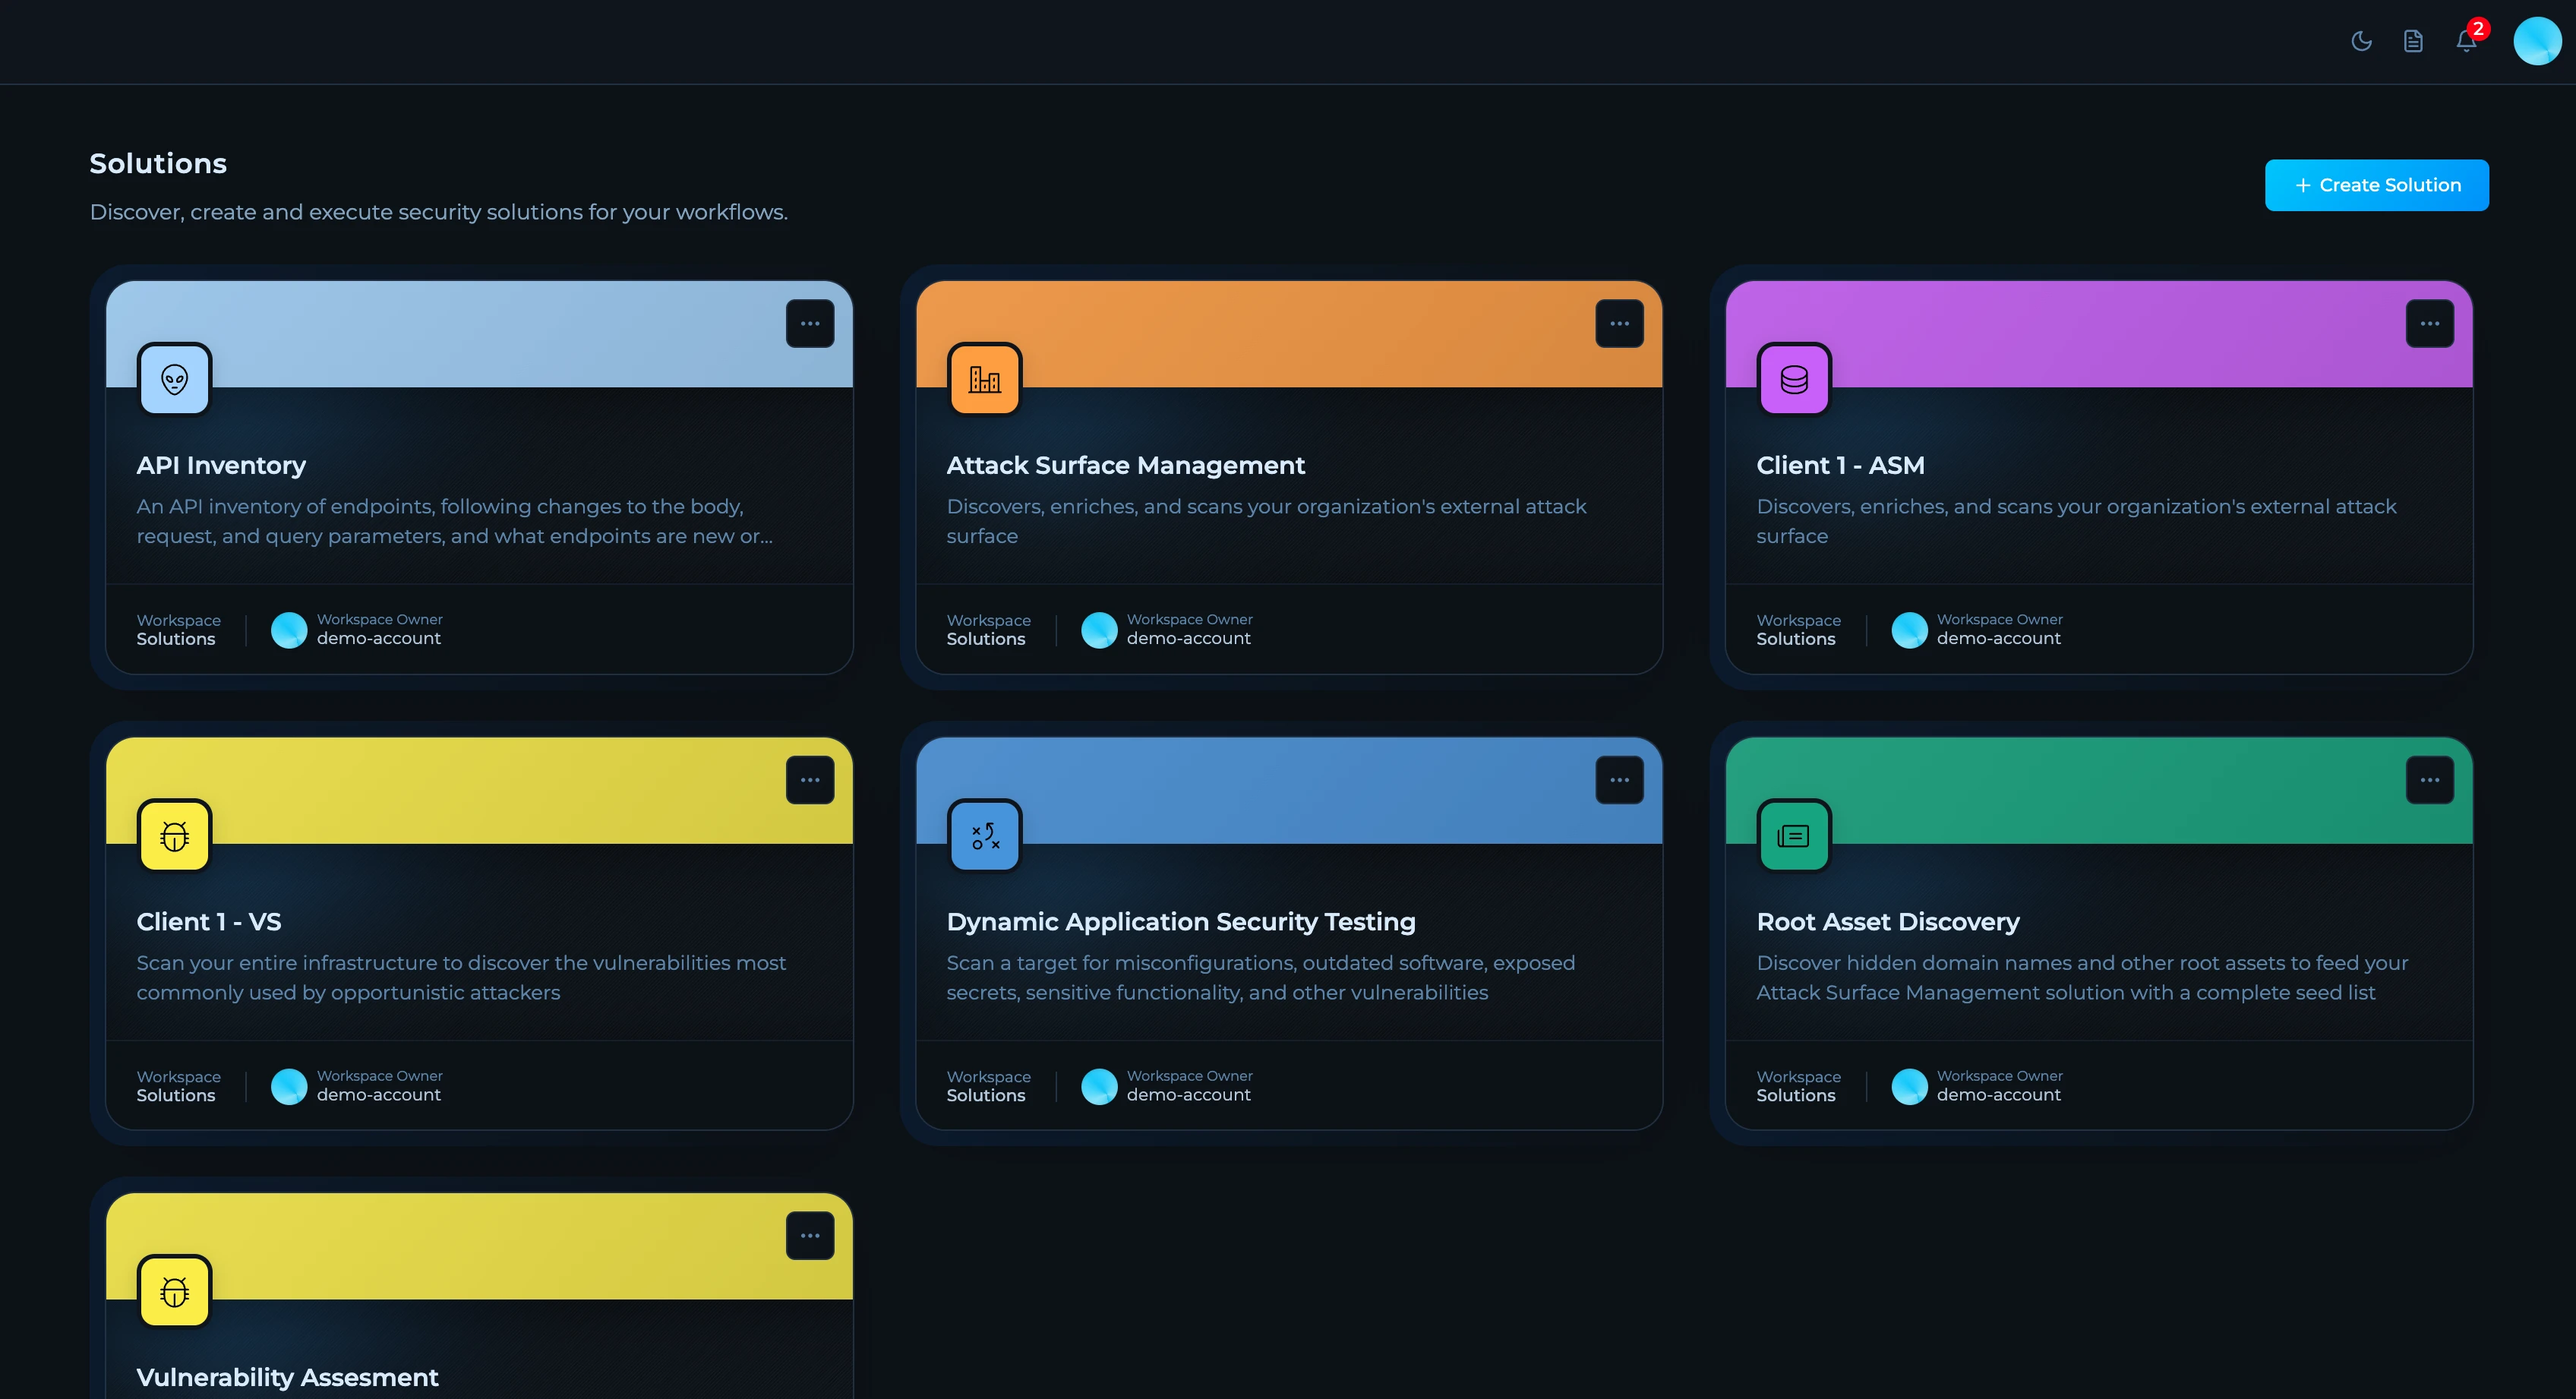
1
Name Your Solution
Choose a descriptive name that reflects the solution’s purpose (e.g., “API Inventory”, “Cloud Asset Discovery”, “Third-Party Risk Monitoring”).
2
Add a Description
Provide a clear description of what the solution does. This helps team members understand its purpose at a glance. You can use AI assistance to refine your description.
3
Choose Visual Identity
Card Color: Select a color to make your solution visually distinct on the dashboard. Use consistent colors for related solutions.Icon: Choose an icon that represents your solution’s function. Available icons include security, network, cloud, database, and monitoring symbols.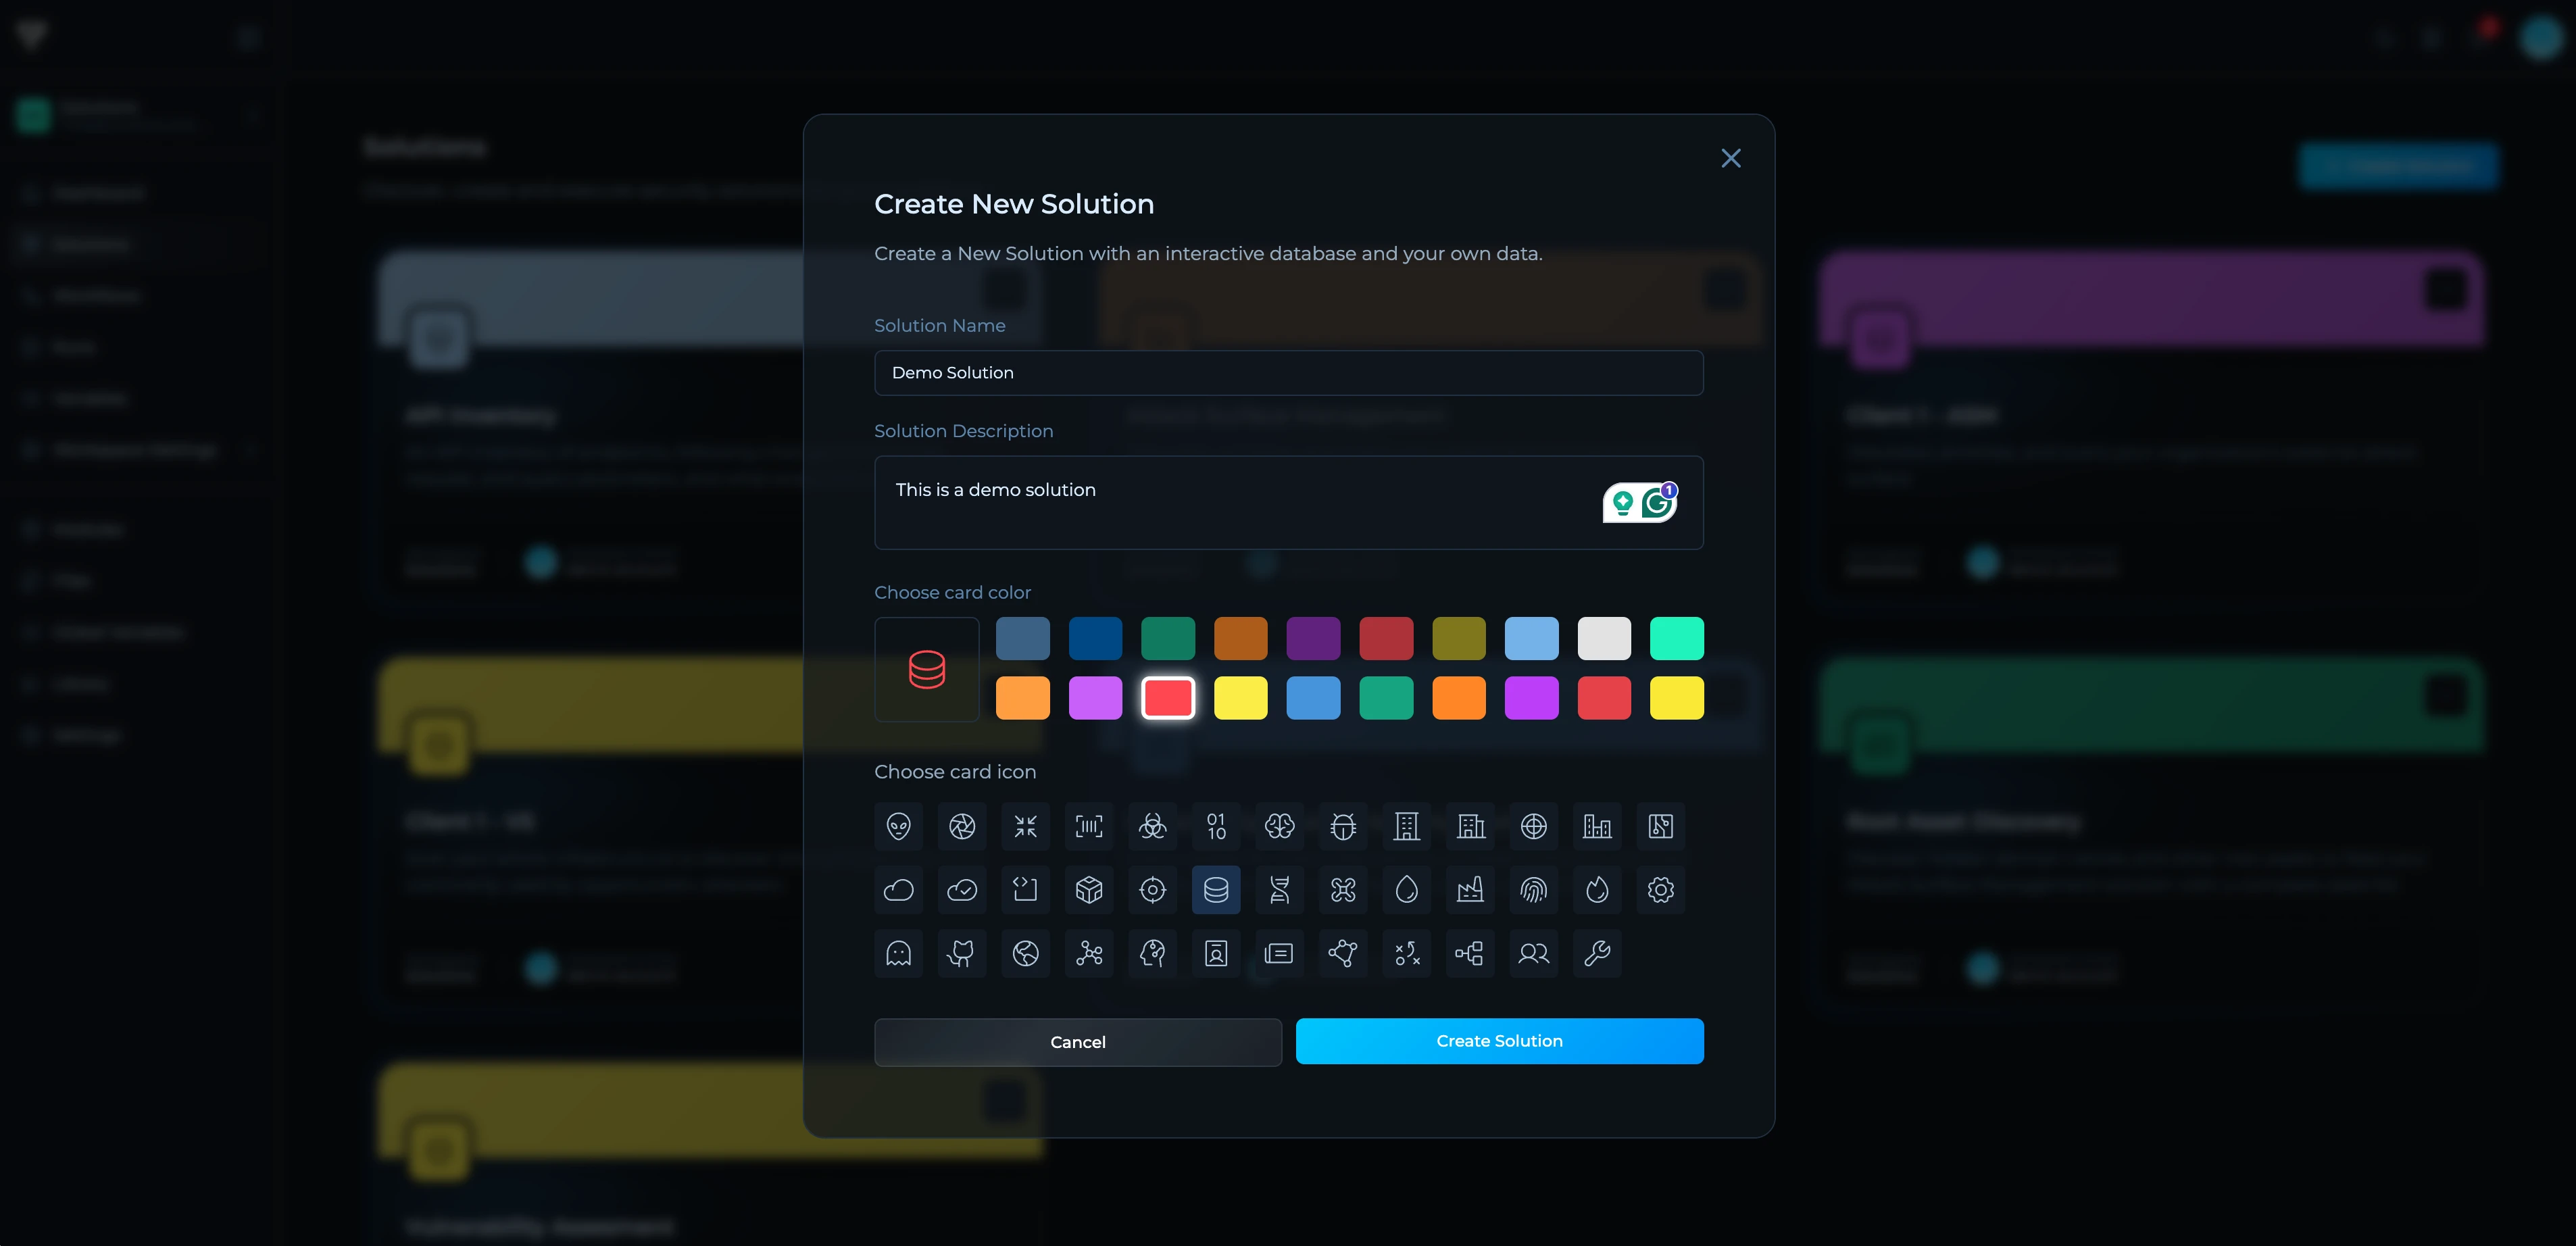
Step 2: Create Your Dataset
Datasets store your solution’s results in a structured, queryable format. You’ll define a schema that determines how data is organized and displayed in Insights.1
Navigate to Insights Tab
After creating your solution, go to the Insights tab and click Create Dataset.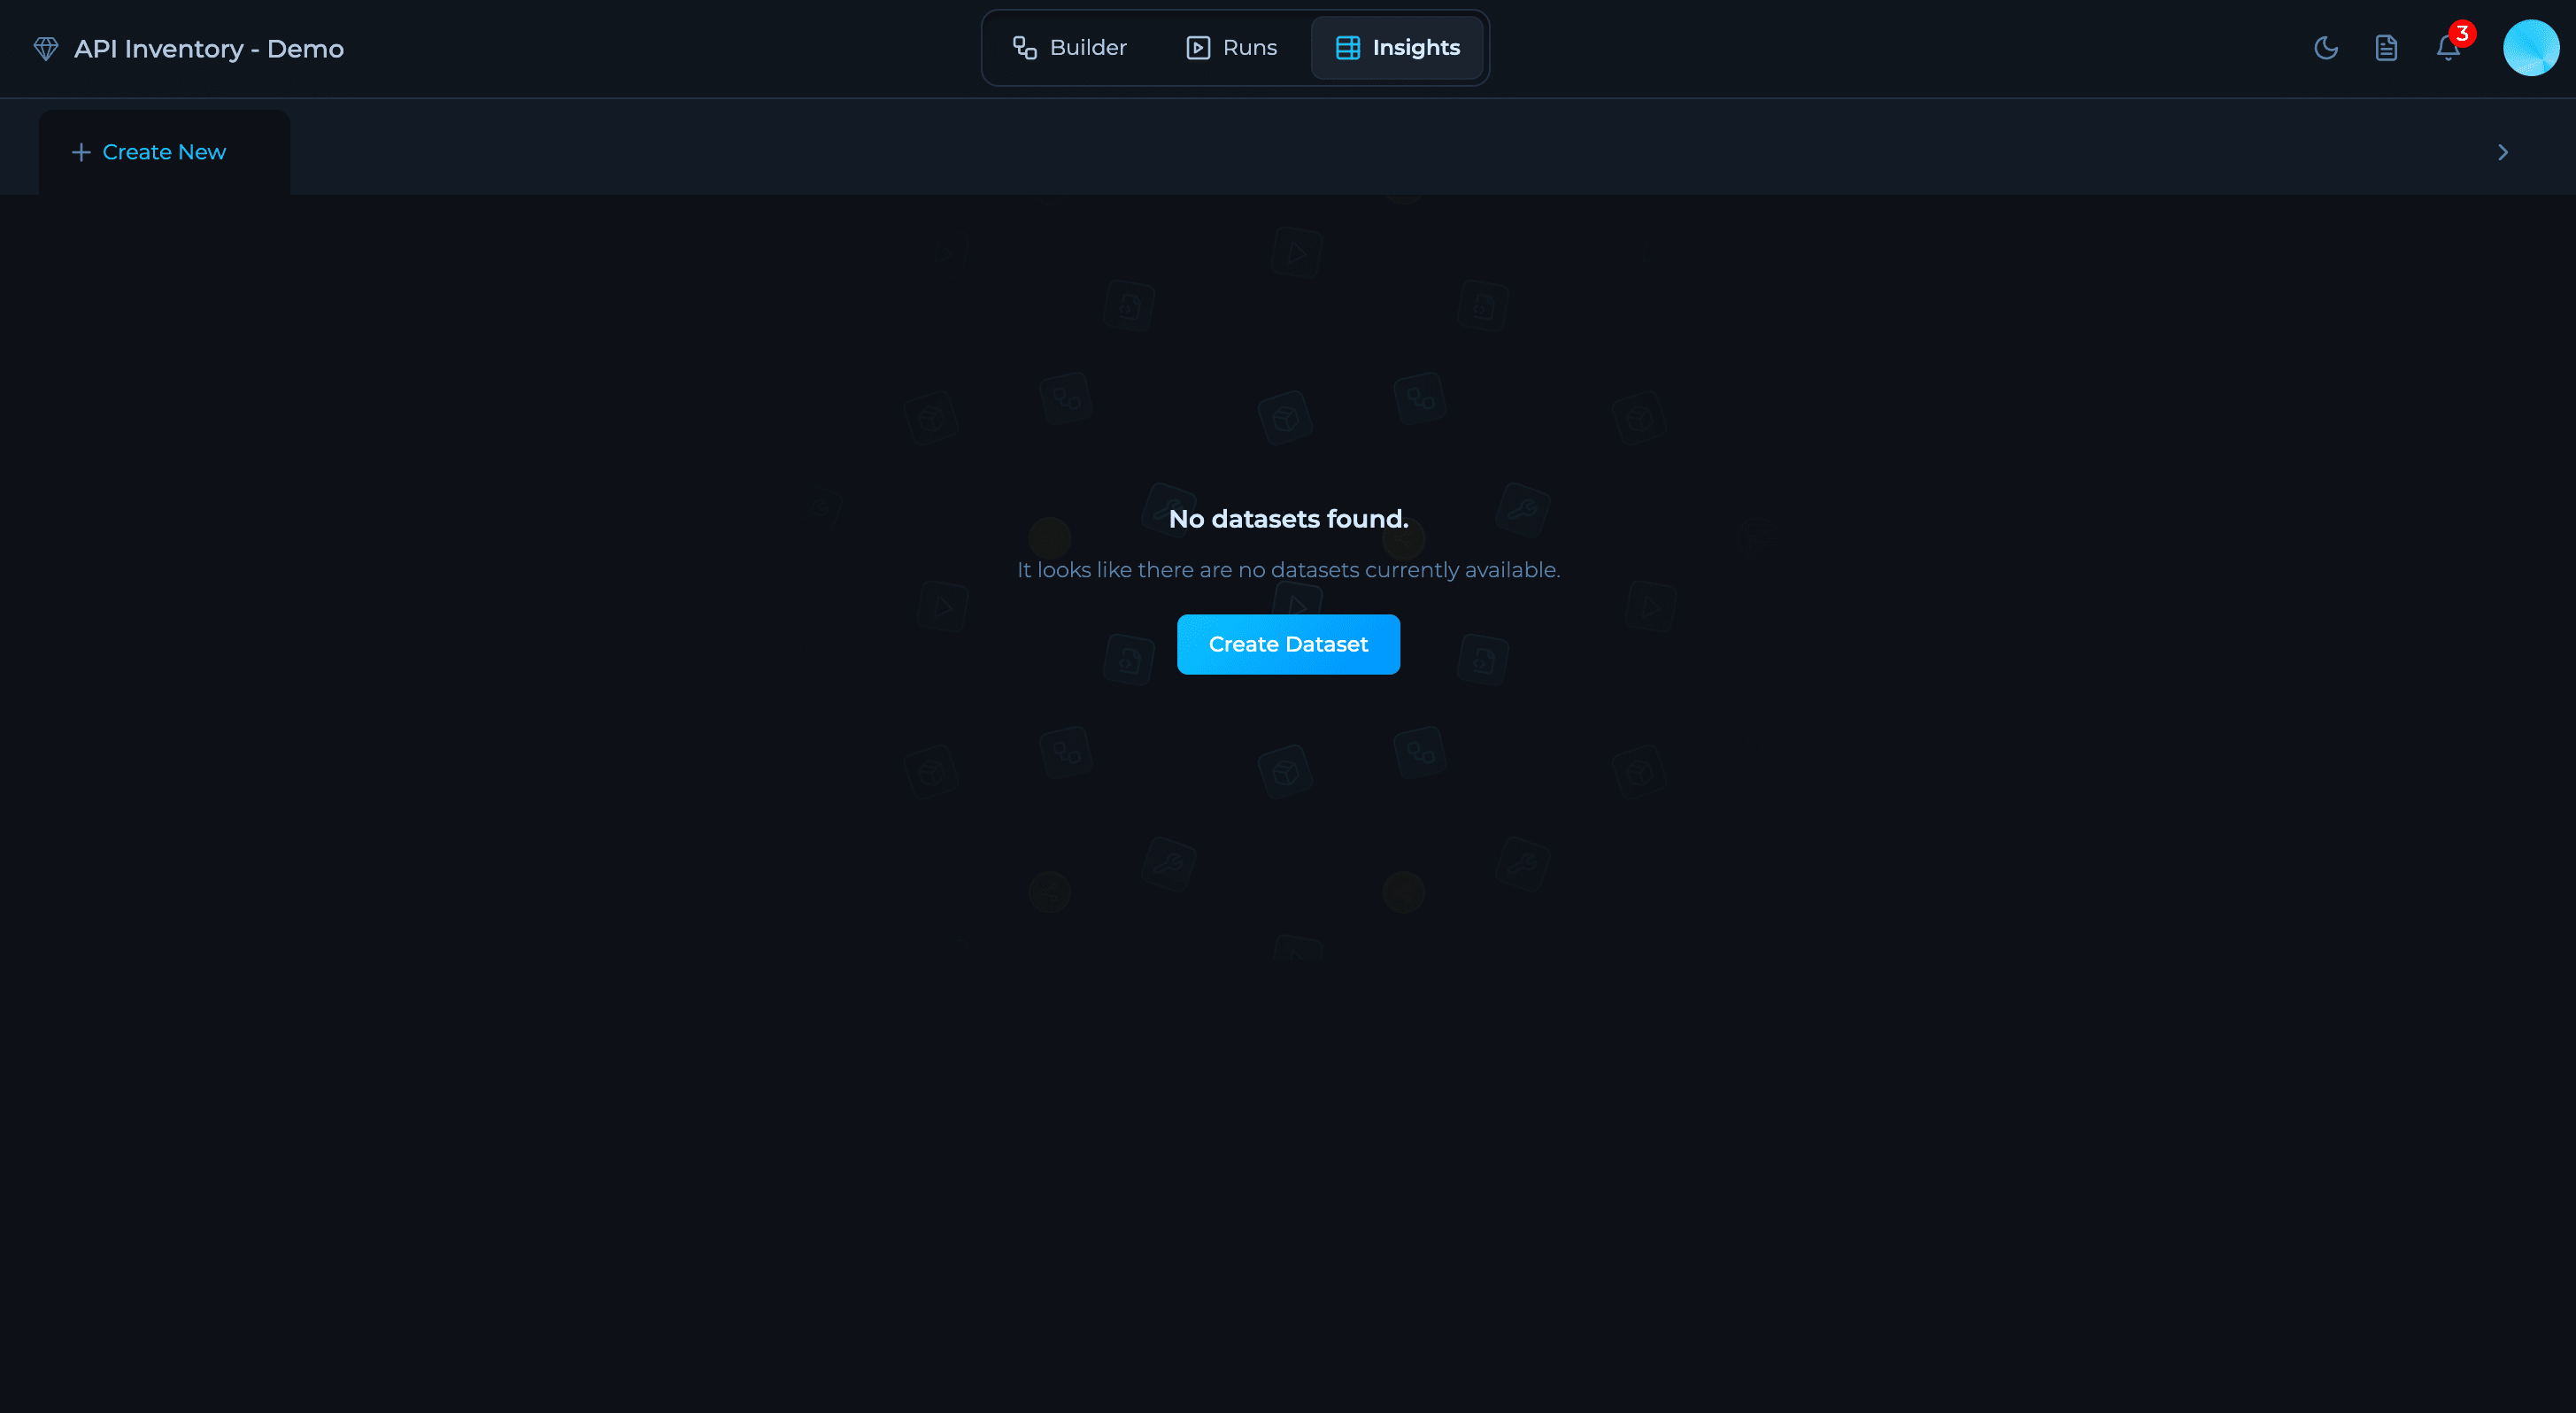
2
Name Your Dataset
Choose a descriptive name that reflects what data you’ll store (e.g., “API Endpoints”, “Discovered Assets”).
3
Define Fields
Click Add key to add fields. Each field needs an icon, name (lowercase with underscores), type (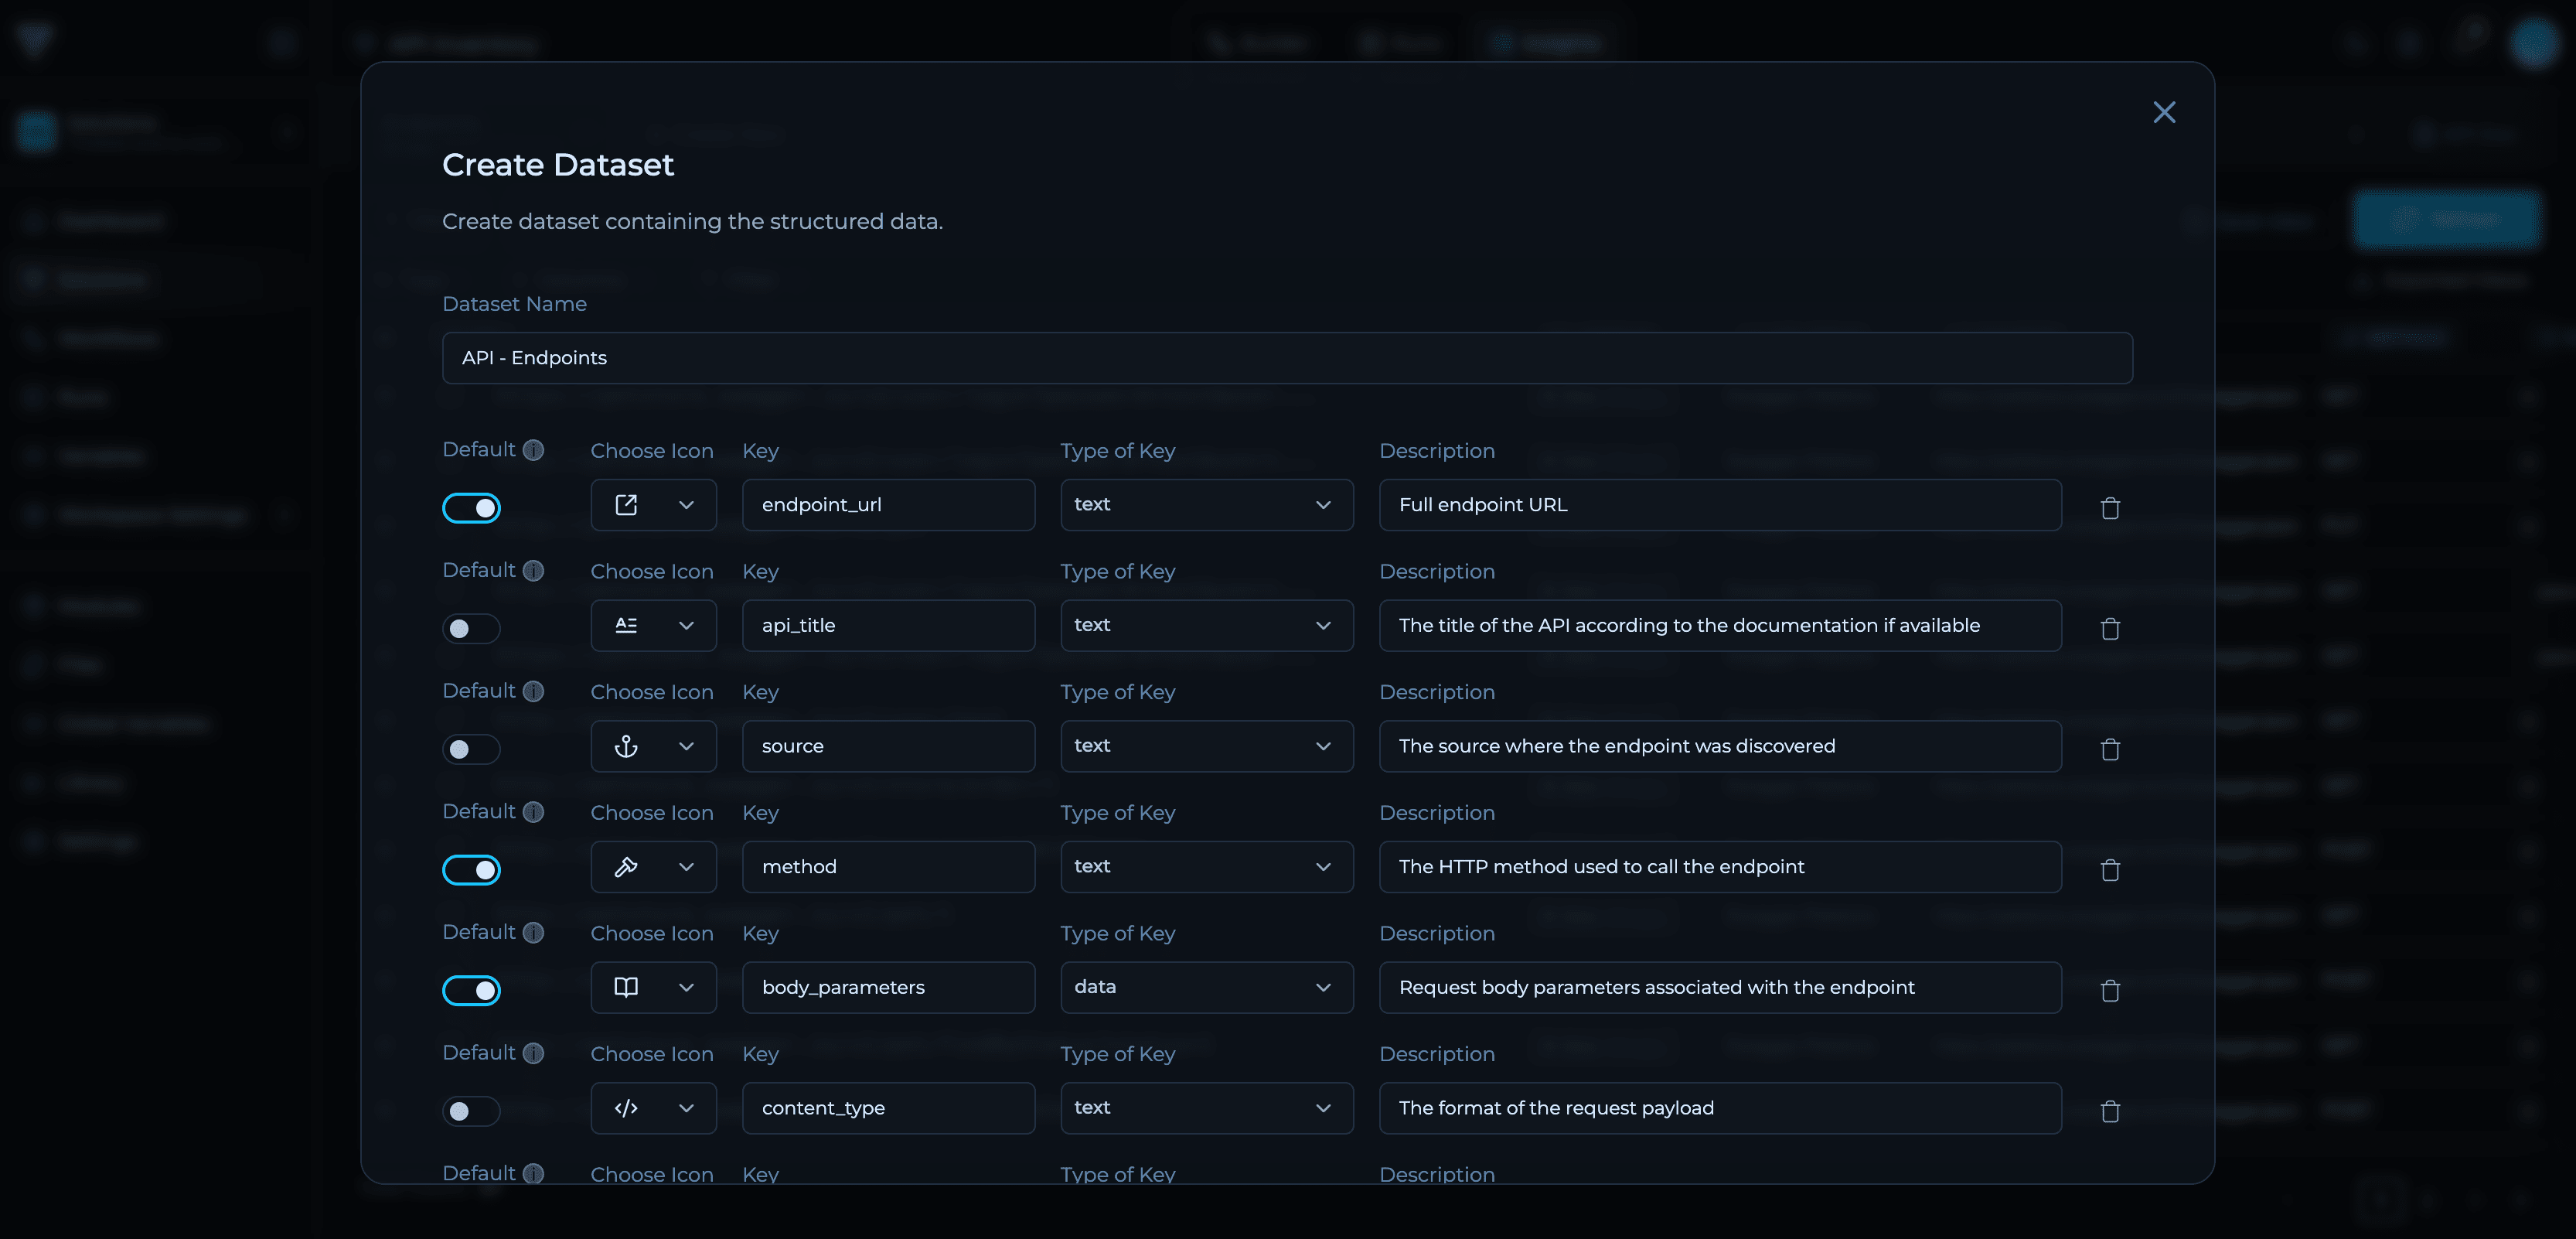
text, int, data, bool, uuid, datetime), and description.4
Mark Primary Key Fields
Toggle Default on for fields that uniquely identify records. At least one field must be marked as default.
5
Create
Click Create Dataset to save your schema.
Learn More About Datasets
For comprehensive guidance on dataset design patterns, field types, API usage, and best practices, see the complete Creating Datasets tutorial.
Step 3: Build Your Workflow
Switch to the Builder tab to design your solution’s workflow. Here you’ll combine tools, modules, and scripts to process your inputs and generate the outputs that feed into your dataset.Workflow Components
Example: API Discovery Workflow
Let’s build a workflow that discovers API endpoints from Swagger/OpenAPI documentation files. This workflow will output structured endpoint data that feeds into the dataset schema we created in Step 2. Workflow: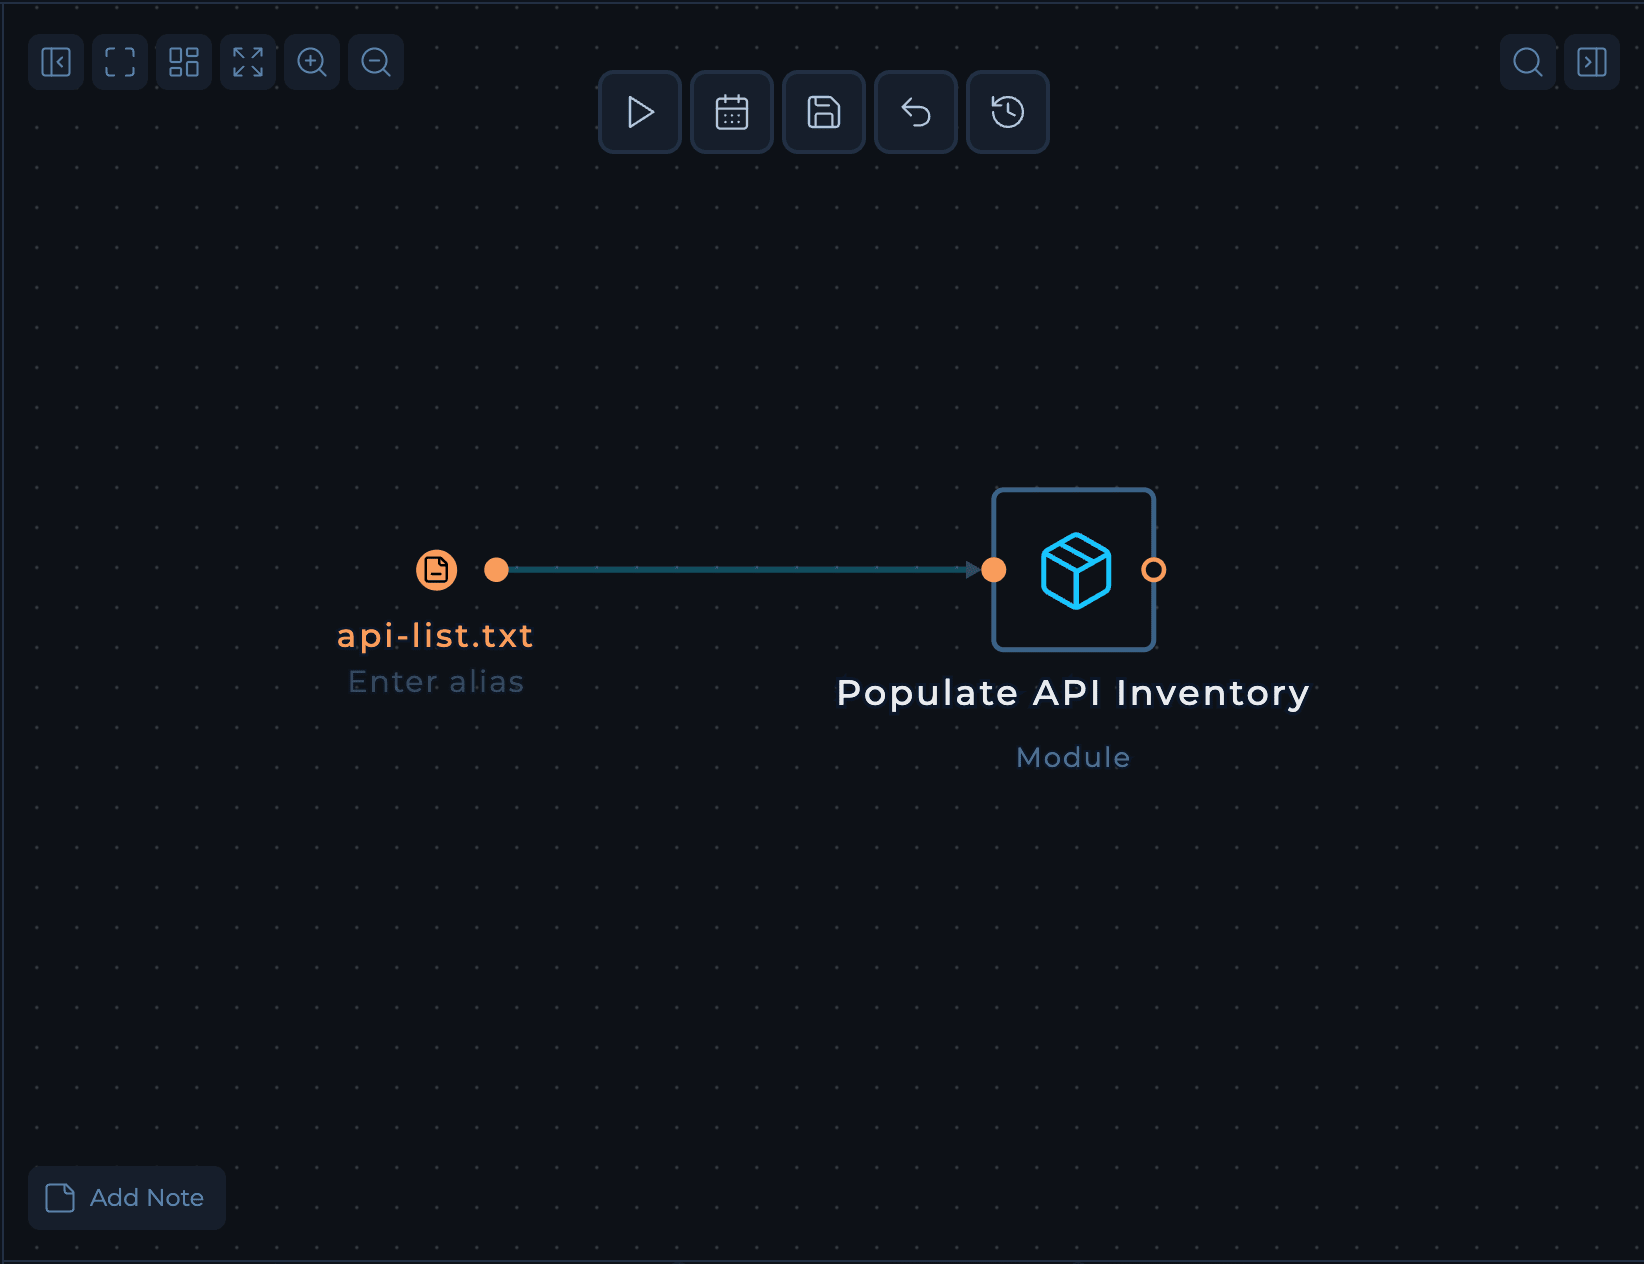
- Input: List of Swagger/OpenAPI documentation URLs (e.g.,
https://petstore.swagger.io/v2/swagger.json) - Processing: Use the custom module to extract API endpoints and structure the data into a JSON format.
- Output: Structured JSON data with endpoint details
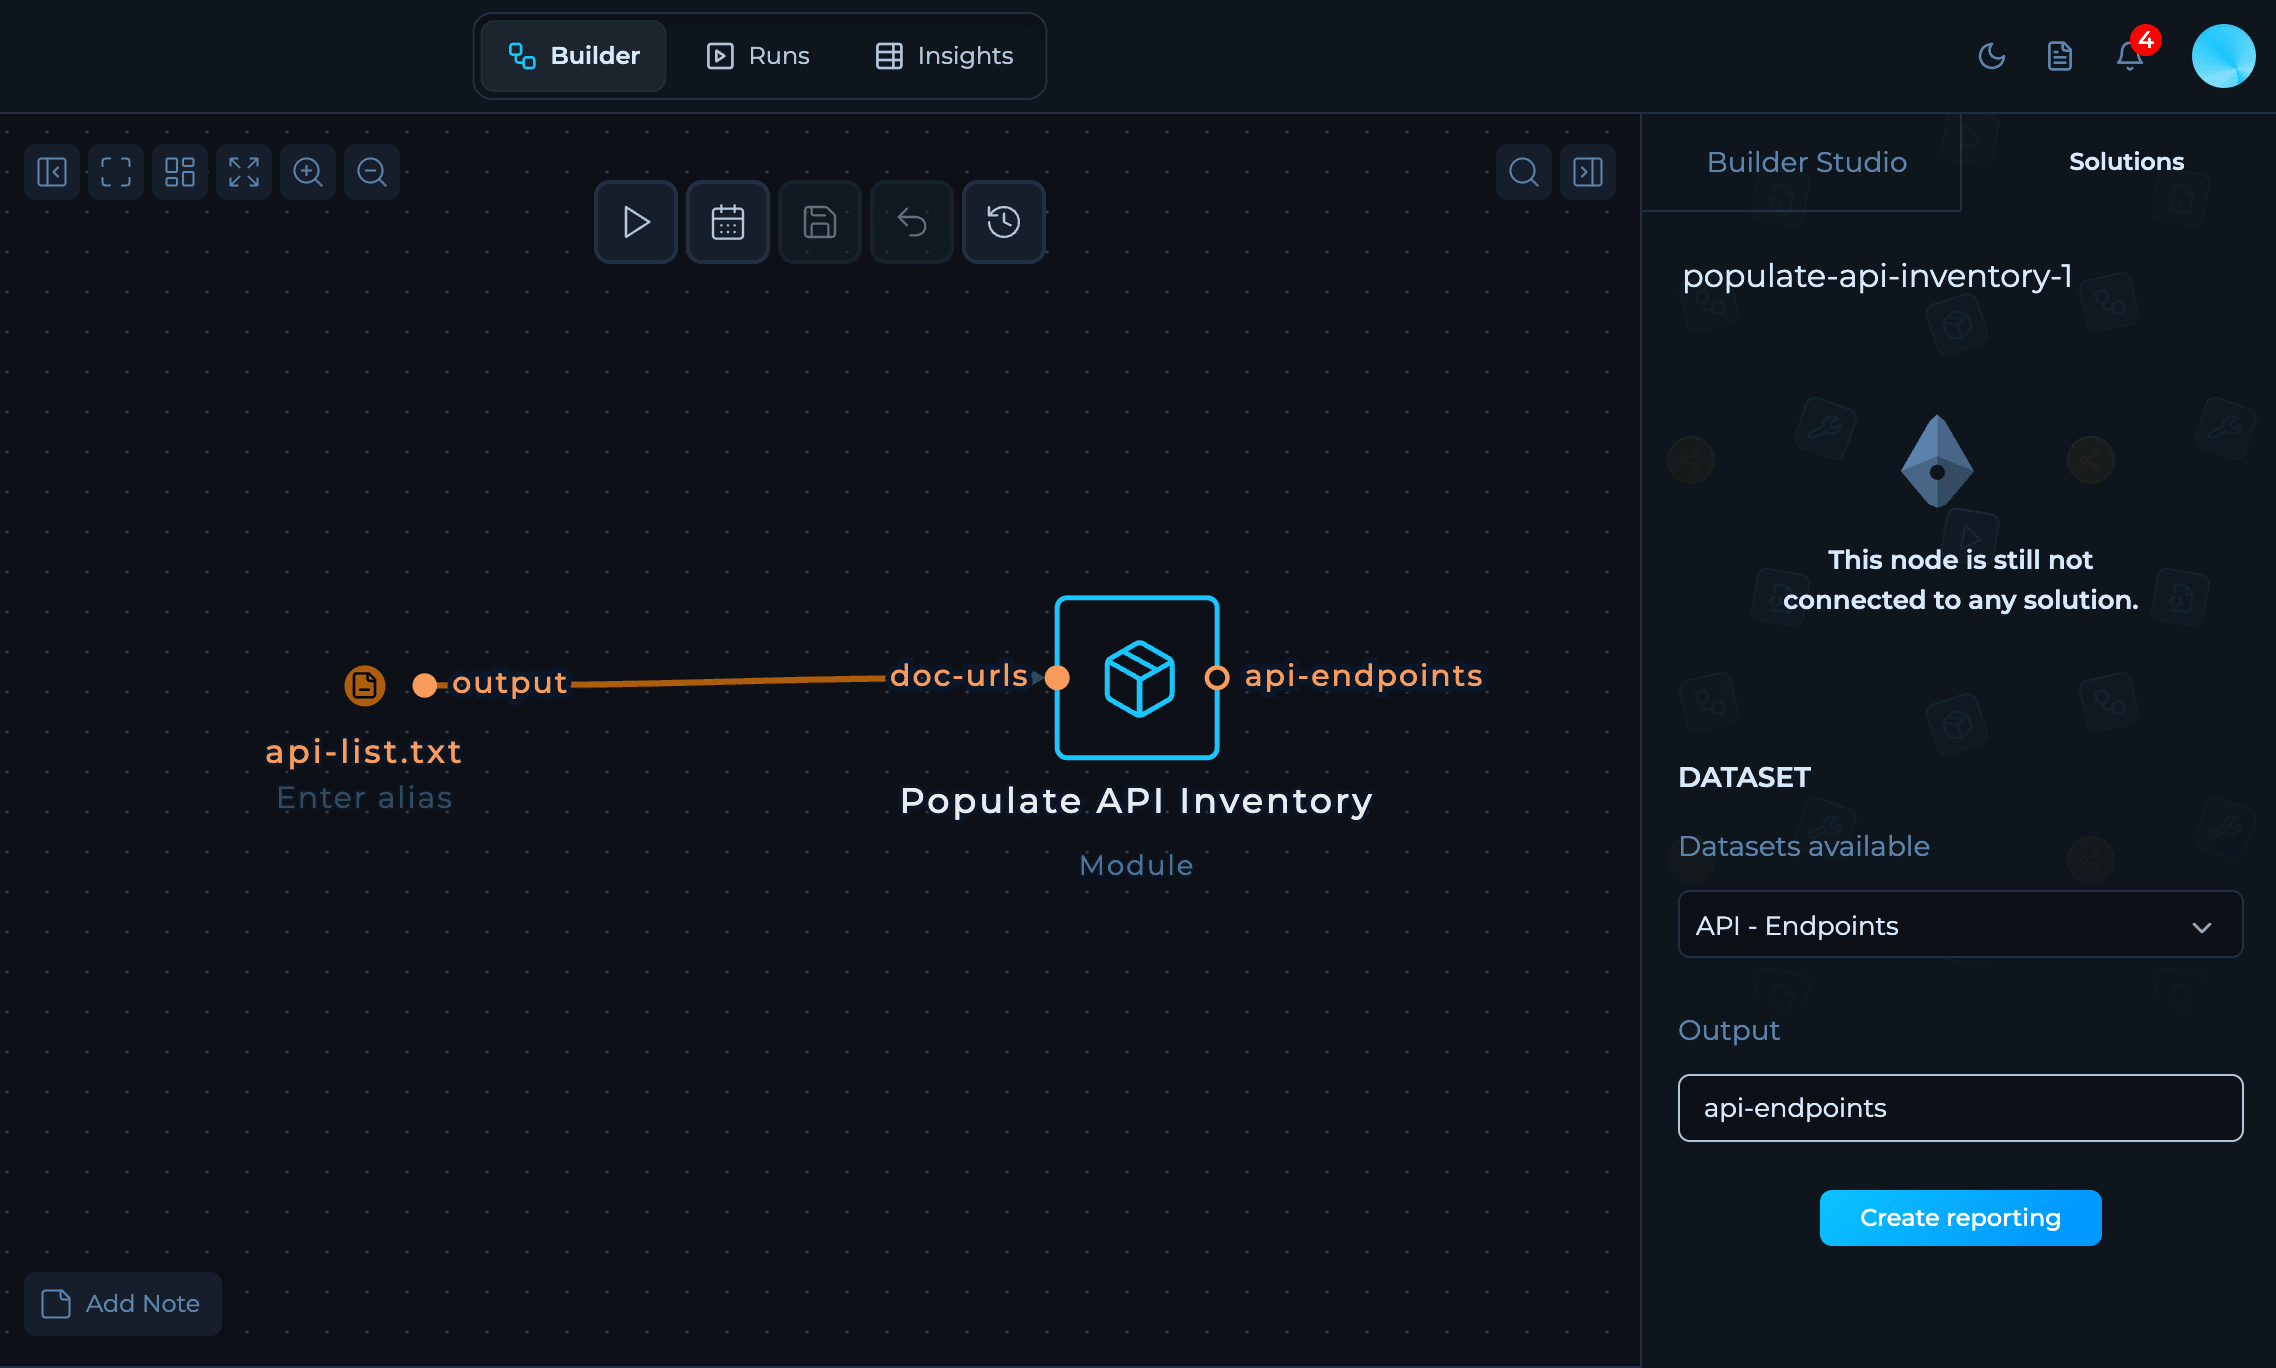
Step 4: Connect Your Workflow to the Dataset
After building your workflow, you need to tell the platform where to send your data. This connection ensures that when your workflow runs, the results automatically populate your dataset in Insights.Select Your Output Node
Click on the node in your workflow that you want to store in your dataset.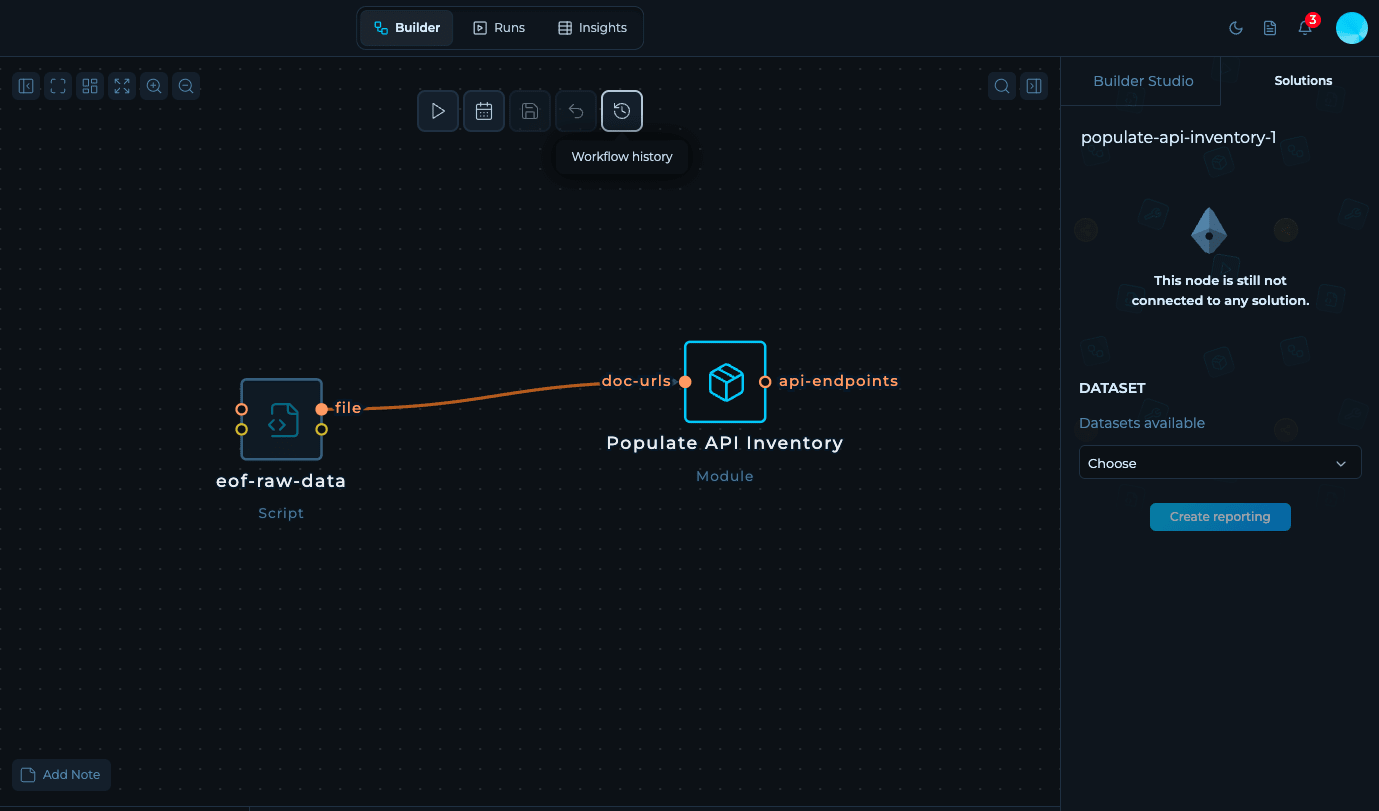
Choose the Dataset
In the right sidebar, look for the Solutions tab. From the dropdown menu, select the dataset you created in Step 2. This links the node’s output directly to your dataset.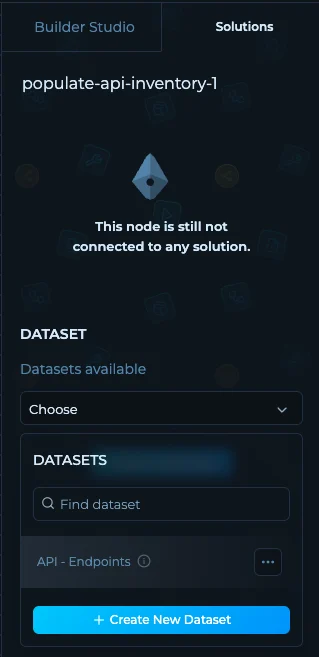
Select the Output File
Choose which file from the node’s output to send to the dataset:- Tools typically produce an
output.txtfile by default - Scripts (Python, Bash) can write to any filename—just make sure it matches what your code actually creates.
Step 5: Run and Check Your Data
Run Tab
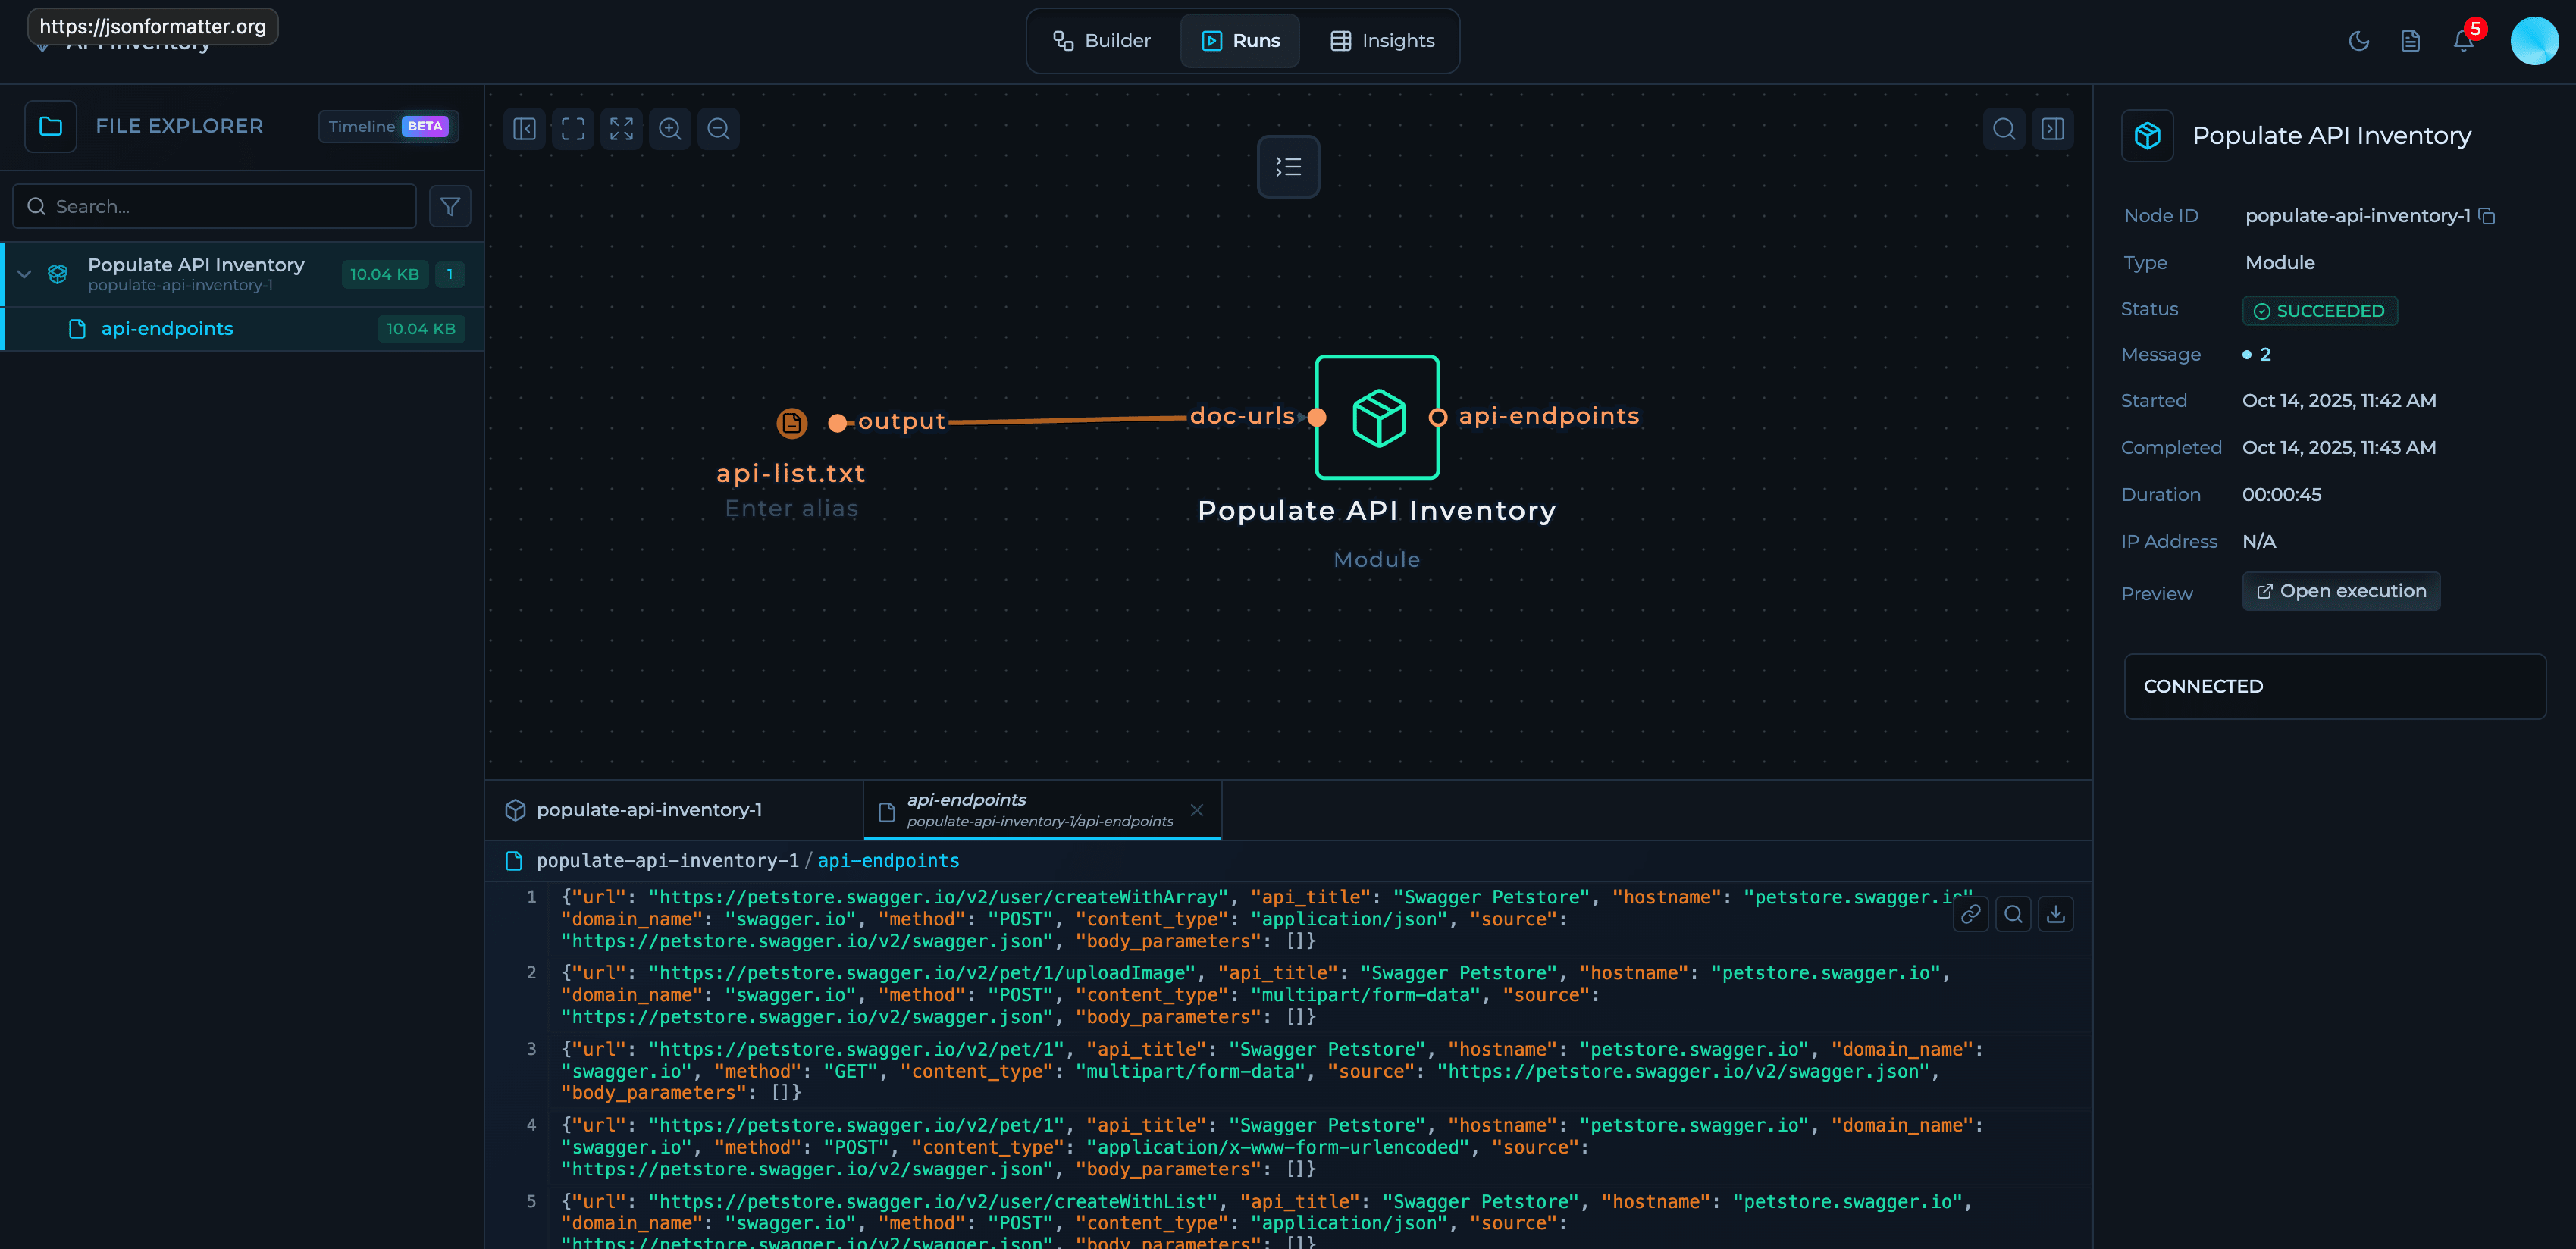
Once everything is connected, you are ready to execute your first run withInsights. The platform will process your data according to the workflow you’ve built.
In Run tab you can see the output called api-endpoints that we’ve created earlier.
Insights Tab
In the Insights tab, you can see the data being ingested into the dataset with out-of-the-box filters, views and API.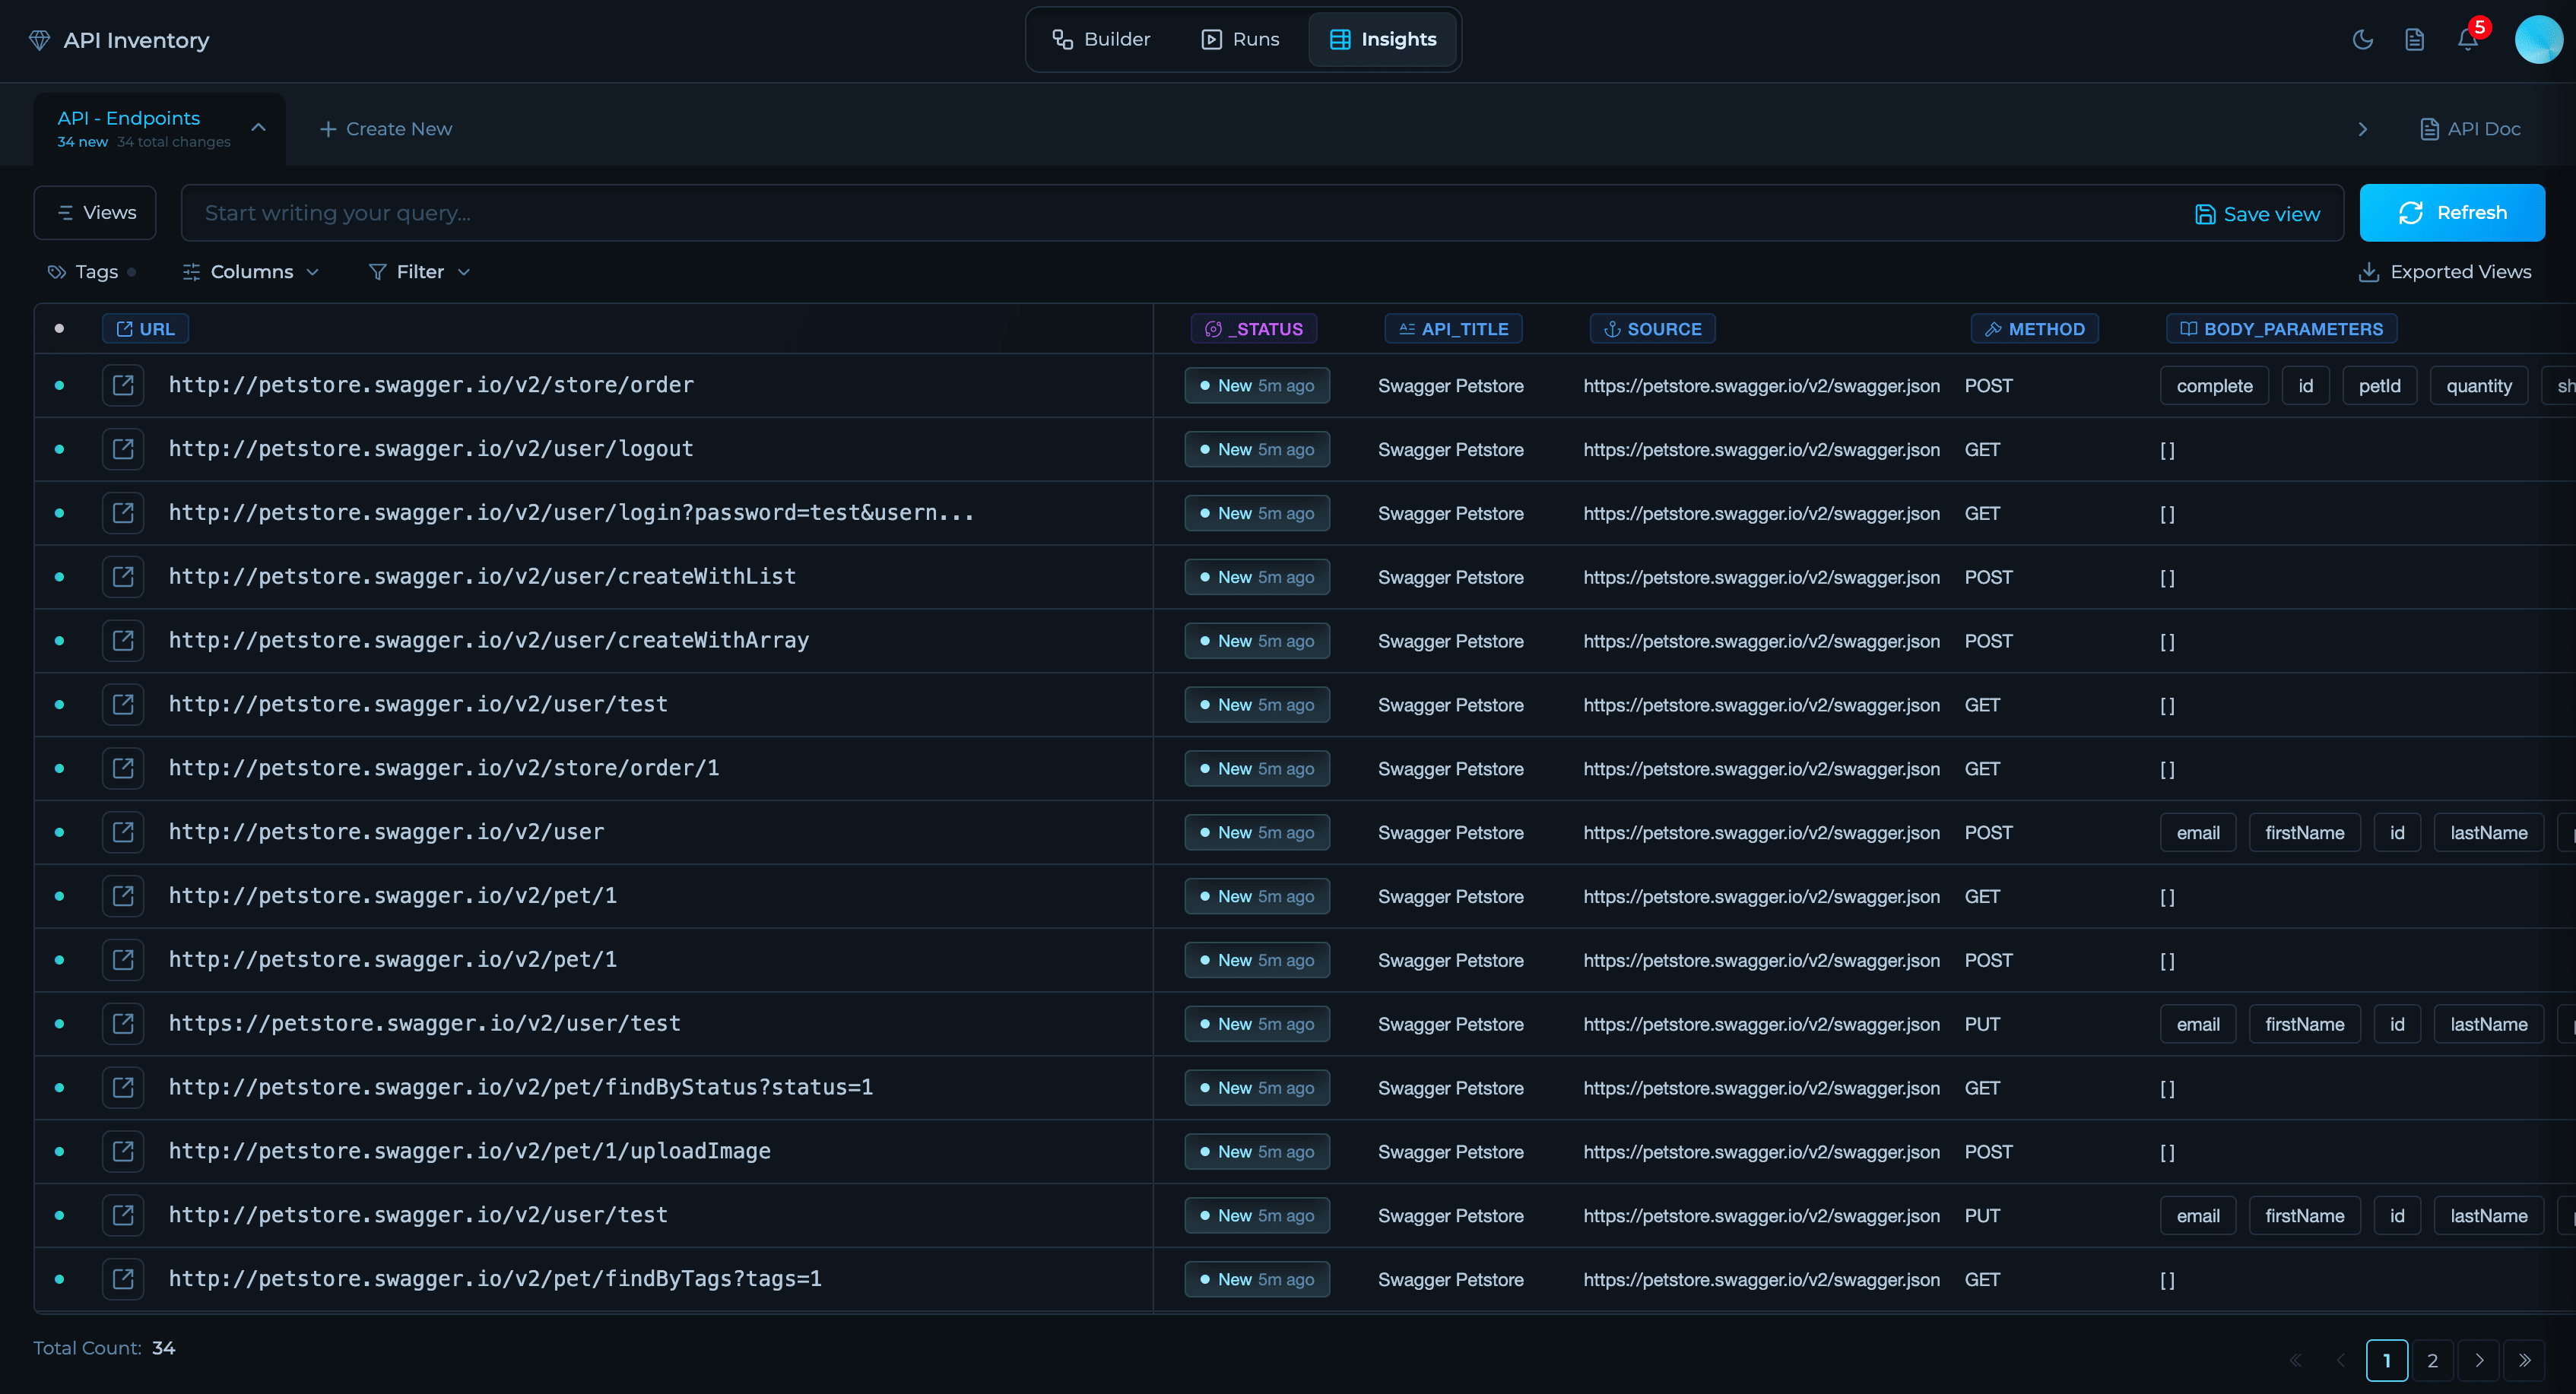
Access Your Data via API
Once your custom solution is running and populating datasets, you can programmatically access the data through our API. Every dataset includes auto-generated API documentation with ready-to-use code examples.Working with Insights via API
Learn how to query your datasets, apply filters, and integrate solution data into your downstream systems using our REST API.
Have questions or need help designing your custom solution? Join our Community or contact support.